Showing posts with label home-interior. Show all posts

4.21.2014

claire's nursery

I'm so thrilled to be sharing these photos of Claire's finished nursery today!  We've been working on her nursery since about February, and we had to wait for a few pieces of furniture to arrive to be able to make the final touches.  I had a lot of inspiration from Pinterest and other blogs, but I think the thing that makes me happiest is that I was able to pull together my favorite elements from those sources and make something truly our own.  We love the bright light this room gets, and sometimes now I just want to go hang out in there.  If you have any questions about sources not listed here feel free to ask/comment!  


Claire's crib is from Pottery Barn, and we loved that it was simple and versatile enough to use again for a second someday baby, even if it were to be a boy.  The decal came from Etsy, and my friend Jess made the tissue paper garland for my shower, and I stole it afterwards!  The little print above the door (difficult to see) is a drawing of the St. Louis Arch.  


This print is from Etsy, and I stole the gorgeous frame from work.  The chevron baby blanket was a shower gift.  


We didn't want to get a changing table per say, but we did decide to use this buffet table from Hobby Lobby to corral all the essentials.  Our chair is from Pottery Barn, and the pouf ottoman & side table are both from Target.  


We wanted to do a graphic detail on one wall, and when a co-worker of mine found these gold polka dot decals on Groopdealz one day, I just went for it!  We love them, and it was beyond easy to do.  I also loved the idea of displaying some of Claire's prettiest dresses as decor, so I picked up some hooks from Hobby Lobby.  The shelf was handmade by family as a wedding gift, and I painted it to coordinate with the room.  The lamp and mirror are from Target.  


One of my favorite items in the room is the balloon painting, which we bought on our honeymoon in Florence.  The rest are prints from Etsy that I framed at work.  


These Rifle Paper Co. prints were something I knew I wanted to incorporate into the room, as they provided a lot of my decorating inspiration.  The banner is also from Rifle Paper Co!  
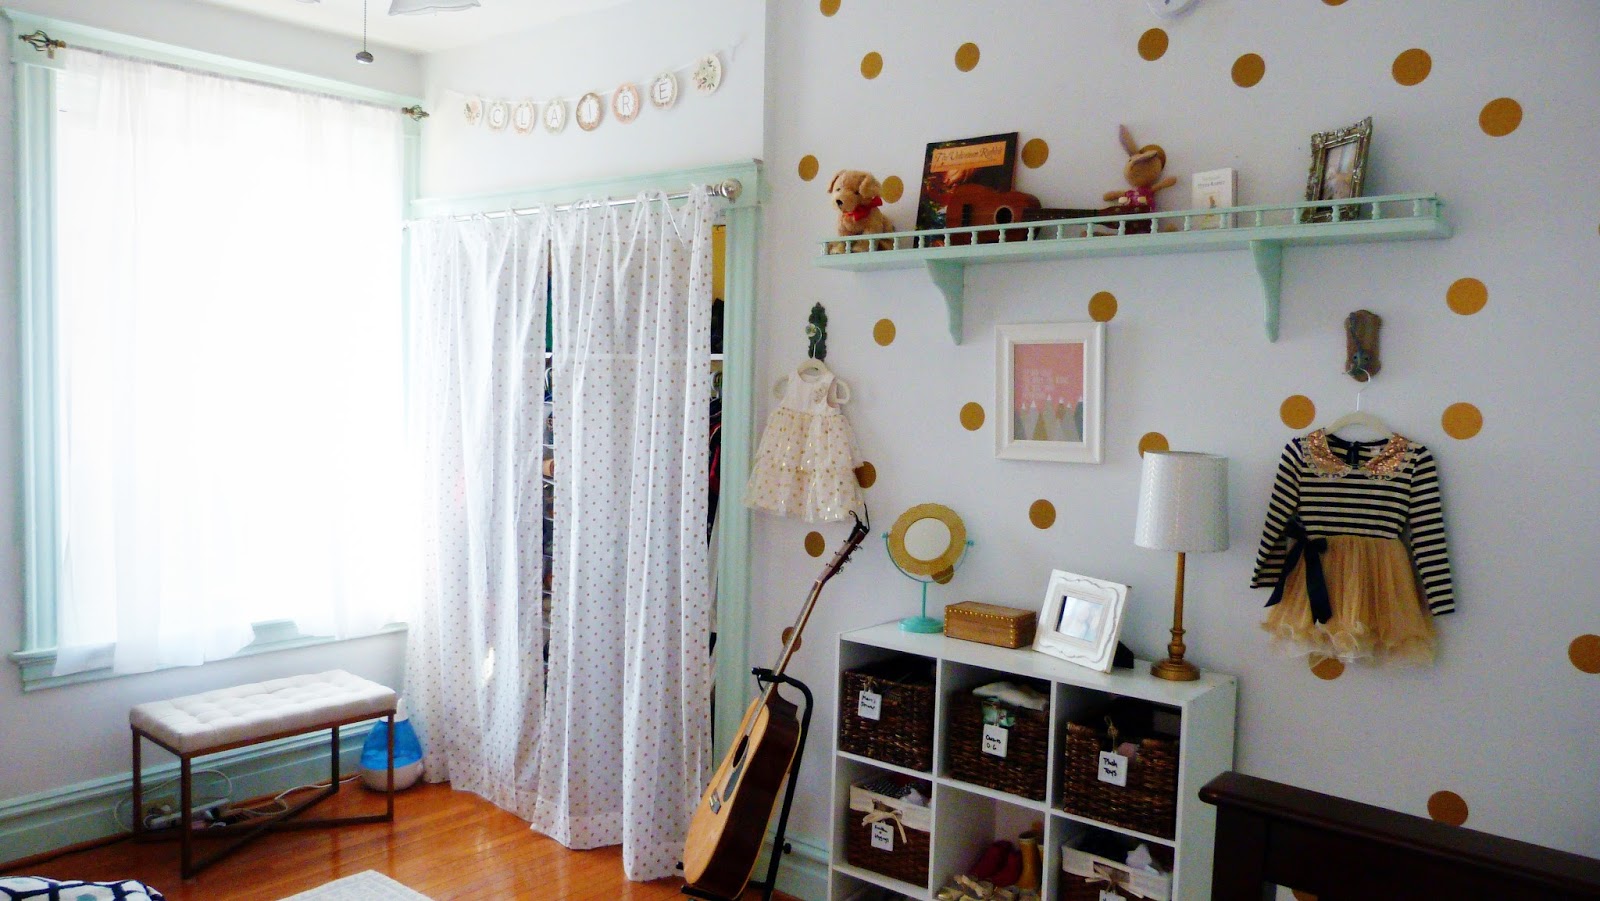

Just a longer shot of the polka dot wall.  I have to share a closet with Claire, so I got a dressing bench to sit next to the window.  The curtains on the closet are a gold polka dot, and it's hard to see how metallic they are in photos!  Darrell wanted to keep his guitar in Claire's room for singing lullabies (and that is just so cute, how could I resist?) 


Just another little view of this table - the gold tray was a steal from Home Goods for only $15, and I saw the idea for storing pacifiers in a hurricane lantern on Pinterest.  I'm also hoping to keep fresh flowers in here all the time - they really thrive with the sunlight and I think they add so much to the room!  


This is my storage system for most of Claire's clothing.  Like I said, we share the closet (many of her dresses I obviously don't want to fold) so I'm keeping onesies, leggings, sweaters, and her shoes & plush toys in this little storage system from Target.  Even the ceramic labels are from Target, and I think they are a genius product!  Dry erase and they make it so much easier - especially for visiting family that may be grabbing something for me.  


That's it!  I hope you liked the little nursery tour - we're fairly thrilled with it and I was so happy to finally be able to share it.  

2.19.2014

rustic & gold at target


About a month ago, when we decided to forego moving in favor of saving some money and hassle, we decided that if we were going to stay happy in our current apartment then it needed a refresh.  I had a pretty particular vision in mind - lots of white and gold, with nothing dark or too big that would make the apartment feel even smaller.  When we eliminated our dining room and made the apartment layout into more of a studio (minus the nursery, which is in our only private bedroom) our number one concern became making sure that we never felt cramped.  I thought I'd have to figure out how to make it work over time, but then I was thrilled to see that Target's Threshold brand had released an entire collection of cream & gold home decor with rustic touches - exactly what I wanted, for half of what I thought I'd spend.  

We've already snapped up the little bench and bedside table, and still have a lamp on the list.  I loved the two pictured here, but Darrell wasn't sold.  Anyways, this is basically just a PSA!   The items are mostly sold out online, but if you click through you can check item availability in your local store, just in case you feel like your house could use a spring reset.  

1.27.2014

my nursery inspiration

It's nursery decorating time!  And I know what you're thinking..."isn't it a little early for that?"  I am only 20 weeks, but tasks like building furniture & painting aren't for the exhausted and super-pregnant, so we're working on getting most of it completed in the next few months.  I thought it would be fun to share my inspiration for the room.  I've had a very clear vision for what I wanted from the start - something feminine and whimsical, but definitively unique.  Rather than buy a pre-made room from a store like Pottery Barn (although their baby rooms are stellar, and we're using a lot of their furniture & decor) I decided to come up with my own theme.  


Her room will be centered around the concept of "World Traveler: NY ==> Paris."  The colors will be pale mint, white, grey and pale pink, with lots of silver & gold sparkle!  All the furniture is a mix of dark espresso, vintage white/cream, and gold/brass.  

I took a lot of inspiration from Taylor Sterling's nursery for her daughter Elodie, which you can see here!  

Lastly, here's my little inspiration board of additional pieces & art I'd like to incorporate:  


We painted the room this weekend, assembled the crib, and hung curtain rods & curtains, but I can't wait to share the whole room once it's finished!  

12.22.2013

wrap it up/your guide to creating the perfect package


To me, Christmas shopping is not the dreaded occasion that many believe it to be.  I find true joy in lingering around stores until I find the absolute perfect gift, whether it's a candle with one of their favorite scents or a scarf I saw them once pin on Pinterest.  Wrapping, however, is entirely different thing.  Wrapping feels like this daunting mountain you have to climb before you reach the finish line.....especially today, when it's really down to the wire.  You have a stack of gifts you worked painstakingly to procure, and yet they still aren't ready!  But it must be done, so today I'm hoping to remove some of the fear from it.  Especially maybe for the few men who read this blog?  I hear lots of guys say wrapping presents is a woman's skill.  Pshhh....read on, for my super simple (idiot proof!) gift wrapping guide.  


Start out with all your essentials - 3 or so rolls of wrapping paper, plain boxes, gift tags, a variety of ribbons (I prefer plain ribbon to curling ribbon!), PLENTY of tape, and scissors.  If you'd like, some little extras to tie on are always lovely, like these jingle bells.  I also know lots of people who like to tie on those $1 glitter ornaments you can find at Target & Walmart, and that's a great addition!  


Cut your paper to size.  This means trimming off ALL the extra.  Fold it around the box in a few places to figure it out.  Now, so many of the paper rolls have this grid pattern, which is insanely handy.  


Once you're all measured out, wrap the longer ends of the paper around to the bottom of the box, and tape in place.  


This is the part most people hate, but it's really easy IF you got the right amount of paper.  With your thumbs, fold in the corners of the paper at the corners of the ends to make to triangles on top and bottom.  Cross the edges of the paper over one another, and tape the triangles into place.  


It's easier to do this with one end of the present done, and you can stand it on its end.  


Now, we have to jazz it up!  


I really prefer real ribbon to stick on bows - I get that they're easy, but they so often fall off.  

So measure your (real) ribbon out, then wrap it from the middle point around the top of the box to the bottom, cross in the middle, and bring it back around the other sides of the box to the top (and um, try to ignore my chipped manicure...)


Tie a knot, then a bow.  


And trim the excess of the ends, into diagonal lines.  (Cutting ribbon into diagonal lines keeps it from fraying!)  


I like to tie my extras onto the center of the bow, so I put a little bunch of jingle bells there, and the gift tag.  Then you trim off the excess string from your add-ons and....


voila!  The perfect present.  

8.20.2013

an end of summer dinner party


Before everyone arrived - our table was made of a pallet wrapped in white cloth, and two unused french doors I found in the basement of my apartment building.  I don't have seating for 12 anywhere in my apartment, so this was a really convenient way to get everyone together!  


Also, it just looked so pretty.  I used a mixture of china I have collected from the Goodwill over time, and some of my everyday dinnerware mixed in.  I scattered some flowers underneath the windows in the doors.  


I made homemade citronella candles with greenery, lemon slices, water + citronella essential oil, and mason jars with a votive dropped in.  The little flower vases are actually vintage crystal wine glasses from the thrift store, and the roses I cut from the bushes in our backyard.  


Turns out little metal votives don't float very well.  This would be me trying not to burn my fingers off while I set the candles in the greenery.  


All in all, it was a beautiful night.  Everyone brought wonderful food, drinks (even some home-brewed beer!) and the weather couldn't have been more perfect.  

8.13.2013

mid summer's night tablescapes


Taking some inspiration from my mother, who is a fabulous hostess, I decided to start up a little supper club in my current city, St. Louis.  I love the idea of making sure our friends get together for no real purpose other than good food, good wine, and a little music and conversation.  Being only 24, I don't have a very large collection of entertaining goods - I don't even have a real dinner table for larger than 4 people!  Even still, I volunteered to host our first month, and with a little creativity and some help from Pinterest, I've cooked up plans to make it a night worth remembering.  These are some of the photos I've taken inspiration from - I'm kind of getting that it's all about the lighting, flowers, and drinks!  

I love the idea of constructing a low table in the grass from found objects and transforming it with a little fabric and some flowers.  I'm fortunate that we're supposed to have perfect weather this weekend, so I'm planning on this method to get everyone seated together.  Just like expensive flowers, sme simple greenery also makes a table beautiful - and everyone looks better in candlelight.  Citronella is essential, but the versions you find in stores are kind of ugly (and expensive!) so I'm making homemade bug repellant with floating candles, citronella oil, and mason jars.  And to make it all feel twinkly and perfect, I'm planning to string some lights over the table.  

8.07.2013

apartment tour

I'm a firm believer that an apartment is always a work in progress, but since ours is in the best place I've had it in a while (newly painted trim and a homemade ottoman have upgraded it a bit) I thought I'd post some pictures!  

It's only a 1 bedroom apartment, so some of these rooms are a little multipurpose.  This is our front room/dining room/music room


Our living room, including the new ottoman I made out of a pallet.  It was so easy!  I found the tutorial for it right here.  And yes, my couch always looks this rumpled, except for the 5 minutes after I fluff it up!  My dogs like to have the run of it.  


The living room also doubles as my office, which is why making a giant ottoman myself was way more economical.  I like a big work surface.  I looked at similar furniture online and I had trouble finding nice options for lower than $700!  


Our porch is one of my favorite things about our apartment.  It isn't all that large, but I've hung lots of plants and have an herb garden out there, and the little mason jar light is my favorite.  


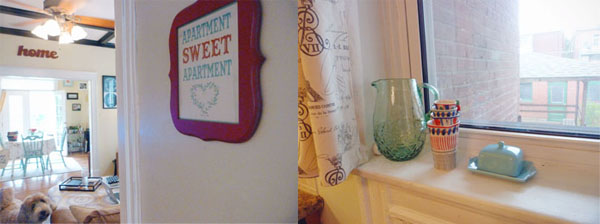
 A few little details.  One of my favorite prints, and I like to keep my prettier kitchen things out on the window sill.  


I used to really hate my bathroom - it's blue and mint green, and that was a bit hard to work with.  I considered painting the tile white, but with a few tweaks I got it to a place I'm really liking.  


Our bedroom has finally become a really great spot to relax, with the addition of a new rug and a little seating area.  I found the peacock chair on Craigslist for just $10, and I got the fiddle leaf fern at an end of summer garden sale for only $12.  It's been a lot easier to take care of it than I thought it would be, and I can't wait until it gets really big!  


Well that's it (I told you our apartment isn't very big!)  Have any of you done any home upgrades lately?  Tried any fun DIYs?  I have to say, I never thought I'd be the kind of person who was actually doing things like painting trim or building furniture, but ever since we decided to stay a couple more years in this apartment, I've gotten really into making it exactly the space I want.  

8.01.2013

wishlist - urban gardening


I've been doing an increasing amount of gardening around my little apartment, and next up on my list is really expanding my herbs.  I need a cilantro plant, stat, because I go through a ridiculous amount of those little bundles from the grocery store.  Cilantro is the BEST.  I'm so glad I wasn't born with that gene that makes it taste like soap - although I suppose that if I had been, I wouldn't really care, because then cilantro would be the height of ick.  

That rope handled planter is where I'd like all my herbs to congregate, and those pretty scissors would keep me from crushing them when I cook.  I have a plain old spray bottle for a fern mister right now, but sometimes pretty things are worth quite a lot in life, and this brass version is so adorable and SHINY.  

And of course, so that I actually learn how to keep all these plants ALIVE, I'm continuing my education in horticulture.  Next up, this little apartment gardening guide I've heard so many good things about.  

I know it's inevitable that summer will end, but I'm going to keep it going indoors as long as I can.

7.29.2013

west elm store preview, and my new favorite decoration

Yesterday, July 25th 2013, one of my most ardent wishes came true (and one of my husband's bigger fears for our bank account was realized.)  West Elm opened in St. Louis!  Okay, okay, I over exaggerate a bit, but seriously I was excited!  I love West Elm.  Additionally, I was thrilled to be invited to a blogger preview of the store, and was fortunate enough to be shown around by Kendall Coleman, West Elm's PR manager for all 51 stores.  

In addition to the whole store being full of amazing furniture and decor, it was also full of ideas, and that was one of the things Kendall emphasized the most.  I took home inspiration for all parts of my house, and I intend to hit up the store often, because they're constantly reworking the items in the store to show the many ways they can work in your home.  


That coffee table to the right will be making its way into my living room in no time - it's only $500, a crazy reasonable price for such an awesome piece, not to mention a dream for someone like me, who works from home.  


Examples of the tablescape inspiration - I LOVED how they put the silverware in the glasses in the left image.  I'll definitely be doing that at my next dinner party.  Another adorable touch?  Little traces of "lived in" action on all the surfaces.  Cheerios on a desk?  Funny, since that's how most of my mornings start.  Its a smart touch, given that it really puts in your mind how you'd LIVE with the piece.  


I was really nuts about this chaise with the reading table.  Such a perfect spot, I could curl up there for hours.  I was also pretty impressed with the price point on the coffee table to the left - it's only $350, a ridiculous steal for a piece that makes such an impact.  

\

I love that even though West Elm is a chain, they do their best to bring city specific touches to each store.  One lovely idea they incorporate is mini Etsy shops throughout.  Here in St Louis we have ReAuthored, a company that makes iPad cases out of vintage books, and Sprouted Designs (one of my personal favorites) who sells hand stamped tea towels.  

Okay, I know I'm gushing at this point (have I mentioned I really love this company?)  but my favorite part of the store was what I took home.  I've been going on about greenery in my house for a while now (see here) and one thing I've really been wanting was a hanging terrarium for my shower.  Weird placement to put a plant in the shower, I know, but I love it.  West Elm was kind enough to give the visiting bloggers a little gift card to pick out something to take home, and I picked one of their adorable terrariums.  

I kind of hate showing off my bathroom here, it's the space in my house that still needs the most work (BLUE TILE, HELLO 80s!), but I do love the way it looks with a little more green!  


Thanks again to West Elm, and if you're living in STL, make sure you check out the new store soon!  

7.26.2013

a happy room


I'm normally not one to mess with natural light - I tend to like for it to stream in at all angles - but sometimes you need privacy, and privacy calls for curtains.  New curtains, in this case, because I was just SO OVER the stuffy damask ones I had previously installed for these doors.  It was a cost effective decision, but not a pretty one.  

But this may just be the year I remember as "the year I learned how to do it myself" and do it myself I did.  I picked out this fun yellow chevron at Hobby Lobby, brought it home and hemmed up the edges with hem tape.  A few clip rings later and I had new custom curtains, at the perfect length.  This has, of course, kind of a created a monster and now I've basically gone around putting new curtains in every room.  

Want the DIY?  Click over to Young House Love.  

Related Posts Plugin for WordPress, Blogger...